

I proudly introduce:

As I said in my last post:
This summer will go down as The Summer of Paint.
"Never underestimate the power of paint," I tell my kids every time I drag out a new "ugly" object to paint. This summer I have painted 7 chairs, 1 desk, 3 night stands, 1 fireplace mantel, 1 fruit bowl, so many candle sticks that I lost count, 1 set of stairs, 2 lamps, lots of odd items that I am not sure have names, plus several random pieces of wood. Did I mention that I did 90% of this painting (including the stairs) on my front lawn? I am sure my neighbors think I am crazy. Cars have stopped and people asked if I was, "having a yard sale?"
It's been a long summer. Long FABULOUS summer.
Here are a few of my before shots:

Cheers to the next 31 days! To see all the 31 days participants click HERE.

1
Little Blue Chair {Paint Series 3}
Welcome Back To Day 2 of:

Personal Note: Today I sent my daughter off to college, well, actually Beauty School. She is going to live an hour away from me. My heart is so heavy. She cried and said that she is scared to be so far away from me. I think it was one of my proudest and saddest moments. Is it possible to be both at once? I am. Ok, pulling myself back together.... on with the challenge:
I found this little chair at an Estate Sale. It was painted white with a gold finish.

It had a burnt orange seat and under that was a bright green vinyl. It is solid oak and cost only $5.

After I glued and clamped where it had spread a little. I sanded it.

I spray painted it with my favorite shade of Krylon Bahama Sea Satin Finish.

I recovered the seat with my favorite checked upholstery fabric which I think matches the paint pretty well.

I have just the perfect spot for it at my sewing table that {surprise, surprise} I just finished painting. So for a total of $12 {$5 chair, $4 paint and $3 fabric} I got a pretty cute little one-of-a-kind chair.
Tomorrows Post: Red Night Stand
Hope you'll join me!

Mondayctober 3, 2011
Red Night Stand {Paint Series 4}
Welcome back to my 31 Days of Paint Series. This is the 4th day of the paint series and the 3rd day of my 31 Days Challenge. {I started the series before I decided upon the 31 days thing.} You can read my beginning post about the Power of Paint HERE or the entire series of posts HERE.
Red Night Stand:

This little night stand was at St.Vincent's Thrift Store for $10 but it was 60% off day so I got it for only $4. It's top was pretty beat up and it had various paint chips at the base and was missing a knob.

I always try to have at least 2 projects going at once so that while one is drying, I can paint the other. Here I am also painting my Dollar Store Winter Wreath that I will be sharing with you soon.

The top of this piece had to be sanded down to the bare wood. Joe used a belt sander on it for me. I used a palm sander on the roughest spots and a sponge sander on the rest of it just to rough it up enough for the new paint to stick. I painted this with a glossy bright red spray paint to match the old finish.

One thing I have learned in all this painting is that: Runs happen. I get a little heavy handed with spray paint from time to time.

When this happens I touch it lightly with a clean rag and blot out the spot. Let it dry and add a few more light coats.

It doesn't completely fix the spot but I'm not too worried about it. {It's going in my Son's room.} If I was selling this piece, I would have let it dry over night, sanded it down to the wood and tried again.

Here it is complete. I really do love this red.

It looks kind of sweet with my blue chair.
Tomorrow's Post: Fall Welcome Sign
I hope you enjoy my new series. I welcome your tips, ideas and links to your paint projects in my comments below.

Tuesday, October 4, 2011
WELCOME Sign {Paint Series 5}
Welcome Back to Day 4 of my 31 Days of Paint series. See the entire series HERE.


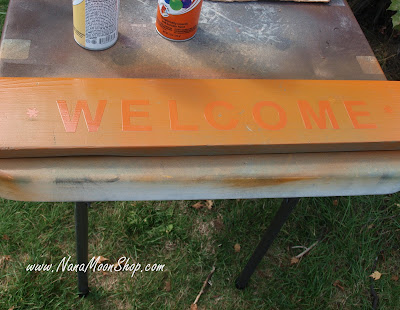


Fall *WELCOME* Sign

Have I told you how much I love the color of "Bahama Sea" Spray paint? I used it to paint my Little Blue Chair and my Fall Wreath {Next Post} and these 2 random boards that I found in Joe's shop.

Before I spray painted the board, I gave it a good sanding. I used a package of Chart Pack letters that I got at Office Depot. I trimmed the letters roughly so that I could lay them out. I marked center and worked my way out from there. {Made a big mess of the letters, as shown below.}

These letters were very forgiving, I repositioned them several times until I was satisfied with the layout.

Then I took a craft stick from my kid's crafting arsenal and rubbed each letter to insure they were really stuck with no air bubbles.
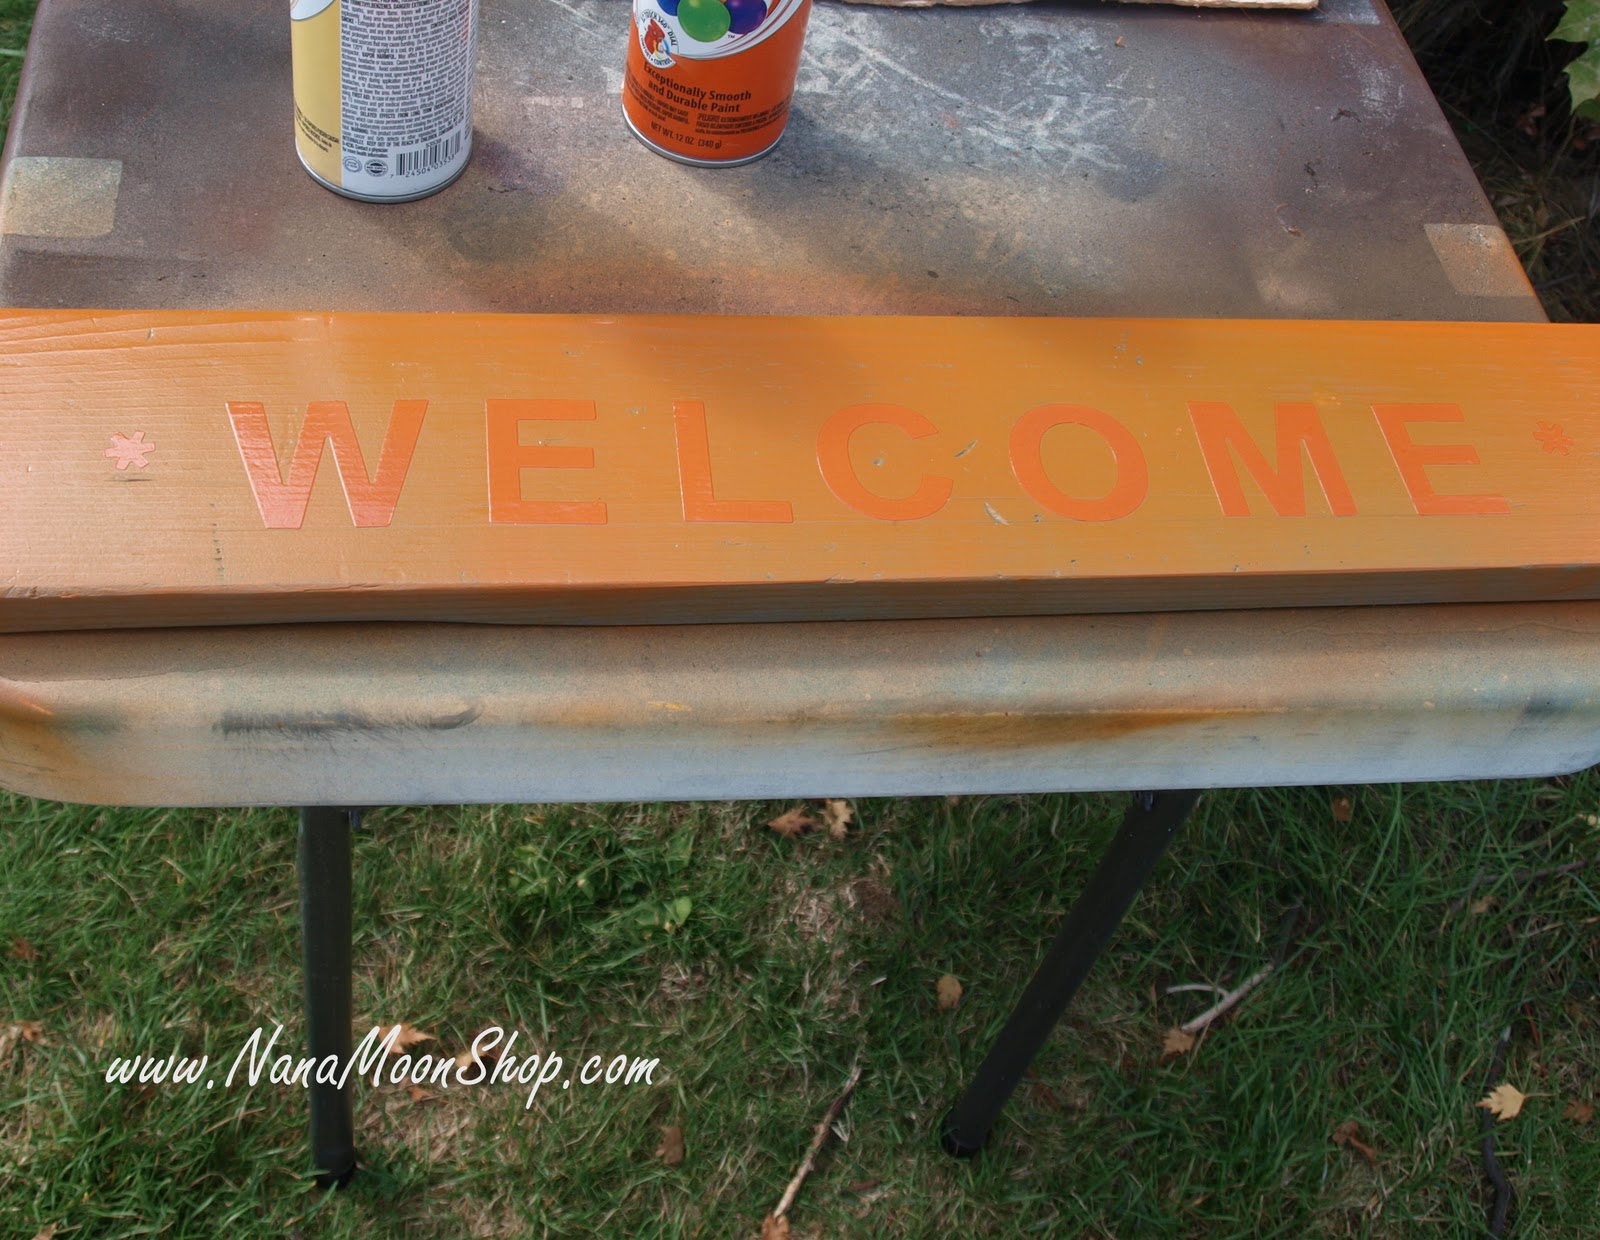
I coated it with 2 layers of orange spray paint and let it dry for 2 hours.

Then carefully pealed back the letters.

I let this dry over night then took my palm sander to it to reduce the shine and make it look more rustic.

I drilled holes in the top approximately 5 inches from each end and threaded a length of ribbon into each hole.

Here it is on my porch, welcoming all.
Tomorrow's Post: Fall Wreath {painted and yarn wrapped}
I hope you enjoy my new series. I welcome your tips, ideas and links to your paint projects in my comments below.

Wednesday, October 5, 2011
Painted & Yarn Wrapped Fall Wreath
Welcome Back to Day 5 of my 31 Days of Paint series. See the entire series HERE.

Painted Fall Wreath

I got this wreath form at the Dollar Store. The simple straw just cried out for a paint job.

The handle on the paint can above makes spray painting so much easier. I highly recommend this under $3 purchase. It really saves your fingers.

After painting the wreath and letting it dry for a day or so, I gathered up 2 shades of yarn. I have been admiring those yarn wreaths that are all over the blogosphere lately. Let me tell you, wrapping an entire wreath in yarn takes patience. Patience that I don't have. So I only half wrapped mine. :)

One thing really good about using this type of wreath is that it is easy to tie your yarn off and start a new color. I just tied off, cut and tied the next color on, wrapped and tied again.

I purchased these pale yellow sunflowers at the Dollar Store too. I popped the flowers off of the stems and cut the plastic piece that held the stem off so that it would glue flat. I also glued one leaf to each flower before hot gluing the flowers to the wreath.

Then I hot glued my flowers in place.

I tied a piece of scrap fabric to the top to form a rough looking bow and wired it to my door knocker.

I tried this wreath out above my Fall Mantel but settled for the front door. I like the colors with my red door.

Here's a view of it on the porch with the Scarecrow I made last fall and WELCOME sign from my last post. {Notice I moved the WELCOME sign up? I am constantly moving things.}
Tomorrow's Post: Ugly Lamp Gets A Paint Job
I hope you enjoy my new series. I welcome your tips, ideas and links to your paint projects in my comments below.

Thursday, October 6, 2011
Ugly Lamp Gets Paint Job
Welcome Back to Day 6 of my 31 Days of Paint series. See the entire series HERE.

Ugly Lamp Gets Paint Job

This lamp is from the 60s, I think. The orange "jewel" is what drew me to it. My youngest daughter wants me to do her new room in orange. She is a Halloween baby so it kind of suites her.

For $2.50, I thought, why not? Are you starting to look at things differently? I look at EVERYTHING and my first thought is to paint it white... or ???

If you turn your lamp over and unscrew this little nut on the bottom, the entire lamp comes loose so that you can paint in between each part.

I taped off the orange "jewel" and the lamp parts that I didn't want to get paint inside of and spray painted the entire lamp a Satin white.

I held the lamp upside down to paint then hung it here to dry.
{On my front porch! My neighbors must think I am crazy!}

What a difference a little paint can make, huh?

I tried repurposing the old lamp shade. I spray painted it orange to match the "jewel" but it just did not take paint. This is 4 coats and it just flaked off that old textured lampshade. {I think we will turn it in to some kind of Halloween decoration, any ideas?}

I found this lampshade at Walmart for under $5 and I think it's a keeper. I have a second lamp for her room that I painted. No "jewel" this time but I think matching lampshades will tie them together. That post is coming up soon. {Now that I look at this, I am definitely going to paint that brown lamp cord. I can't help it, I love paint!}
Tomorrow's Post: Candy Corn kids paint craft project
Wow, 6 days of painting projects in a row, I can't believe it. Thanks so much for stopping by! I hope you enjoy my new series. I welcome your tips, ideas and links to your paint projects in my comments below.

Friday, October 7, 2011
Painted Candy Corn Kids Craft
Welcome Back to Day 7 of my 31 Days of Paint series. See the entire series HERE.

Painted Candy Corn Kids Craft
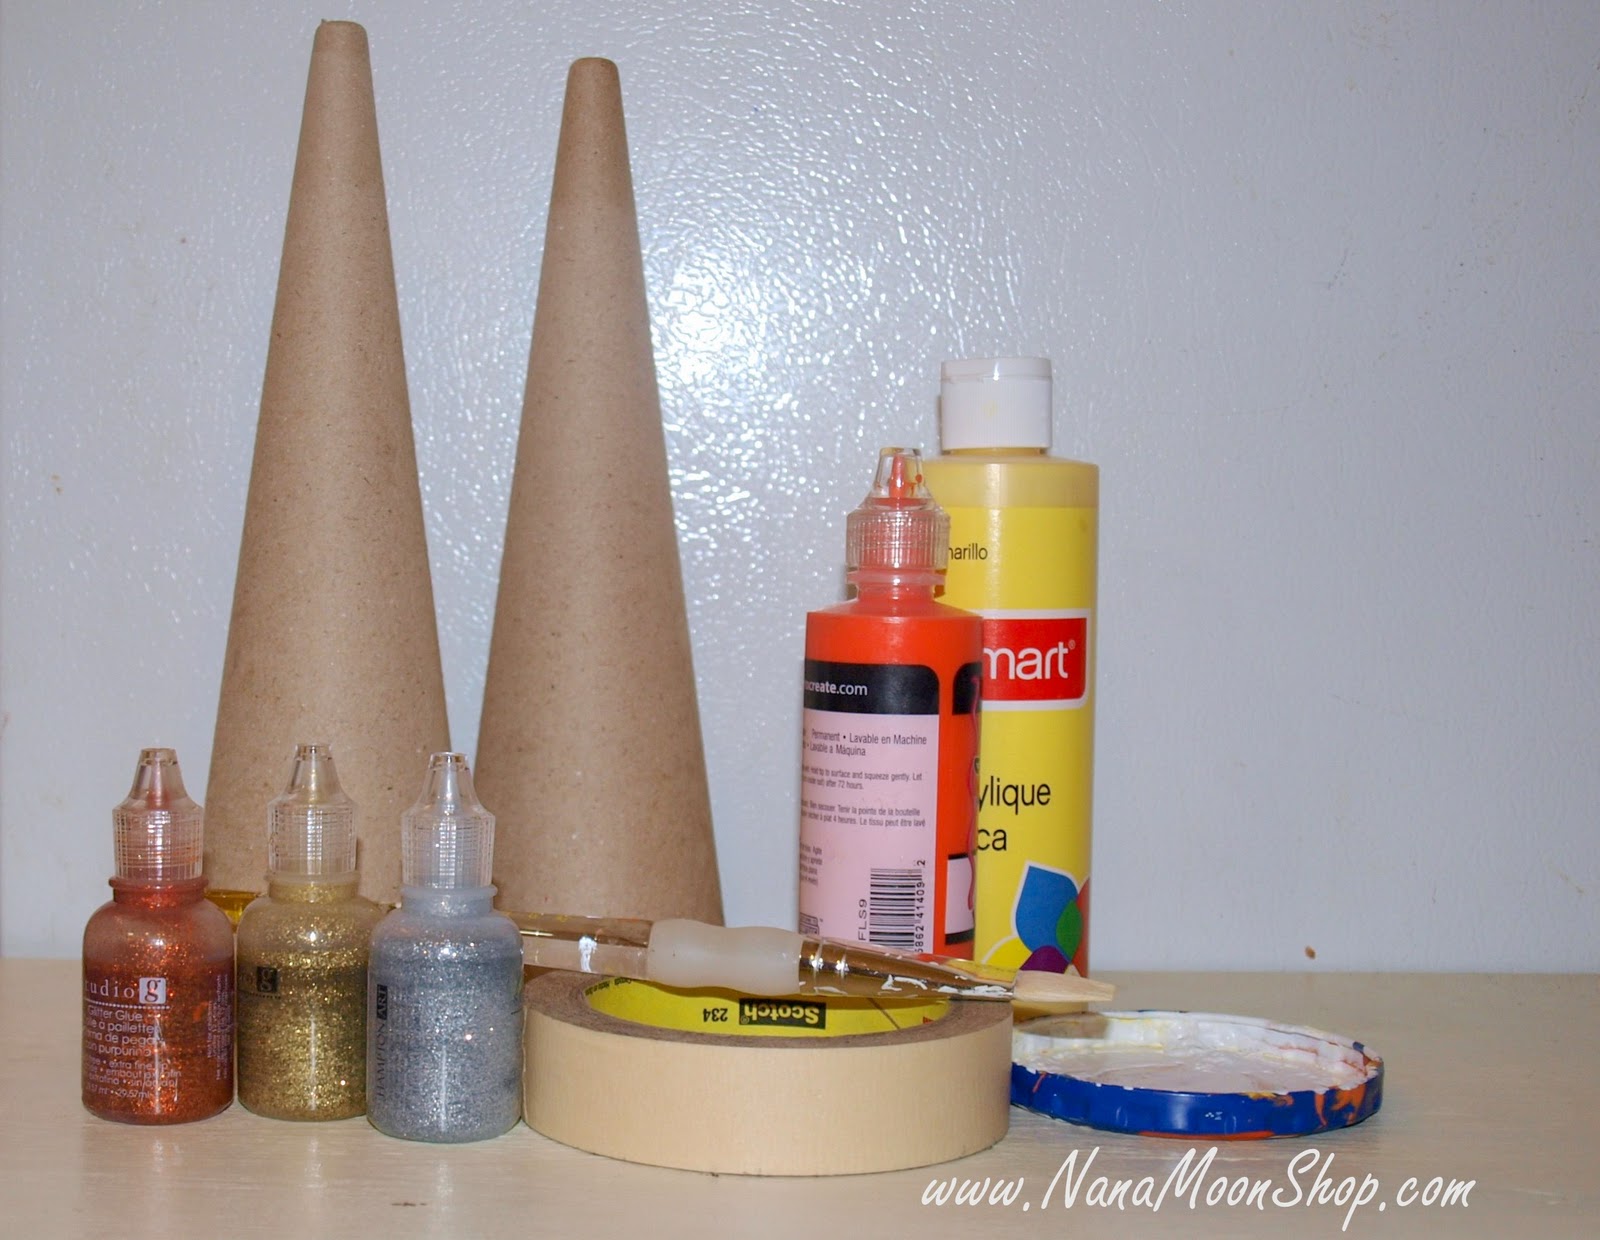
For supplies we used 2 paper cones, glitter glue in orange, gold and silver. Craft paint in orange, yellow and white. We actually used white house paint because we were out of white craft paint and fabric paint for the orange. {Use what you've got, right?} Tape, paint brush and an old jar lid for pallet. We also used craft paper to cover the work surface and Daddy's old shirt to cover the Kiddo.

I taped off one section of the cone at a time and assigned a color to each section and had Sophie paint each color. While one color was drying, we went and washed our jar lid pallet, paint brush and hands. When one color dried we removed the tape and moved on to the next color.

We spread this project out over 2 days, but it could easily be done in 1. When all the paint was dry the next day, we added the glitter glue, one at a time to match the paint color. No tape was used. She just followed the lines. I helped smooth out some lumpy spots but otherwise, I just let her go for it.

They are messy and imperfect and I love them. After all, Sophie is 5. These will be with us forever.

Here is a triangle piece of scrap wood we found in Joe's shop and used the same technique. Sophie painted this one too. She loves to paint. She's so much like her Momma. :)

These little paint projects are a so much fun. They are messy and creative as all the best things are. I do recommend complete supervision when doing this project. I left the room to get my camera and our white Chihuahua had an orange spot between her ears. It wore off eventually after some scrubbing.
Tomorrow's Post: Honesty I don't know... hmmm, a surprise.

Painted Mantel For Faux Fireplace
Welcome Back to Day 8 of my 31 Days of Paint series. See the entire series HERE.

Painted Mantel

I have always wanted a fireplace. I live in the mountains of North Idaho and don't have a fire to sit in front of in the middle of winter. It just feels wrong. I found this mantel at the Habitat Restore.

I loved the scroll work, the crown molding and the fluted columns.

What I didn't like was that cherry colored stain. It matched nothing in my house. So I propped it up on saw horses on my lawn and sanded it. Most of the sanding was done by hand because of all the details.

After sanding, I broke out the white satin finish paint. I actually used porch and floor paint. It is tougher than regular paint since this is going in a high traffic area where it is bound to be bumped into by kids and toys, I thought it was a good precaution.

This took at least 4 layers of paint by hand with a brush and small roller.

These little scroll details were the toughest to cover, lots of nooks and crannies. But it was well worth the effort.

Everything looks better painted a crisp white, don't you think?

Here is my temporary "fire". I have big plans for the interior of this mantel, but for now my picnic basket, huge Candy Corn and wreath will work.

I love being able to decorate a real mantel, here it is for decorated for Fall. I have since added pops of orange for Halloween.
Tomorrow's Post: All About Distressing. Am I brave enough?

Sunday, October 9, 2011
Painting & Distressing Furniture
Welcome Back to Day 9 of my 31 Days of Paint series. See the entire series HERE.
Painted & Distressed Mirror

My sister, Heather bought this distressed mirror at Farm Chicks a few years ago. It is my inspiration for my distressed mirror.

Not sure if I would go this far with the distressing. I love the look, but I am just not that brave.

I love the natural finish of the top with the painted, distressed legs of this table and of course, that aqua color! But am I brave enough to do this to a piece that I spent hours painting? Why not? It's only paint right?


I took some English Chestnut stain to it just to add some age.

Some areas I roughed up more than others.

I think it goes better with my Grandma Clara's settee that I recently inherited.

My "after" picture would have looked better if I had taken these pics this during the day light but you get the idea. Distressing this actually made me like it more. I was going to take it down and replace it with something else because it looked too new with the settee. Now it looks aged to perfection.
Tomorrow's Post: Chalk Board Paint
Thanks so much for stopping by! I hope you are enjoying my new series. I welcome your tips, ideas and links to your paint projects in my comments below.

Monday, October 10, 2011
For the love of Chalk Board Paint
Welcome Back to Day 10 of my 31 Days of Paint series. See the entire series HERE.

For the Love of Chalk Board Paint

We love Chalk Board Paint! We painted Chalk Board Paint on the back of all of my kids bedroom doors. This is in my middle daughter Sabrina's room. Her friends usually autograph it when they come over.

This is the wall in our hallway upstairs in the "kid zone". Sophie and her cousin Hannah have spent hours playing here on this chalk board painted below the chair rail. My teens can some times be found with their friends adding graffiti to it too.

This little rolling pin chalk board is one of my favorites and hangs on my kitchen wall with several vintage kitchen utensils. I borrowed the quote from The Farm Chick's Cookbook.


The metal man with the sun is a scrapbook embellishment that I found at a "dime store". I used the chalk board paint to paint the frame, that I had previously painted a shade of green. I thinned the red paint with water so it let the green show through. I also did a little distressing to it.

This was the first chalk board I ever made (yes, 12 years ago). We have used it to count down the days until birthdays and Christmas. Every December it reads: "Star Light, Star Bright 25 Days Til Santa's Night." And we count down the days accordingly. Something my oldest daughter, now 18, came up with when she was 6. A chalk board tradition, if you will.

I am making several of these chalk boards (above) for my shop and for Christmas gifts for my friends. Chalk boards are so versatile and fun. I love being able to change them on a whim.
Tomorrow's Post: I'm not sure... hmmm... I'll get back to you! :)

Tuesday, October 11, 2011
How To Make Wood Look Weathered
Welcome Back to Day 11 of my 31 Days of Paint series. See the entire series HERE.

Making Wood Weathered

Joe and I made this magnetic message board from an old window frame, a piece of pine scrap wood for a shelf and the bottom board was once part of our basement stairs. I was going to cover empty window opening with fabric but decided on this piece of tin flashing that we had. I got the hooks at Lowes for $2 each. Walmart also carries them.

We just attached the tin with upholstery tacks. {Be careful working with this tin, it is very sharp.}

My shelf board was dirty but too new looking compared to the other finishes.

And the ends where Joe cut it are far too fresh. They need to look old like the rest of the piece.

I searched online for a solution to turn new wood gray. I tried baking soda and hot water tip but all it did was clean the wood and make it look newer. So I went to my paint cabinet for supplies. I usually use this Tung Oil on freshly stained pieces that I want to preserve but don't want to be shiny. It is reads "Low Gloss" on the label. I mixed it with about a teaspoon of black craft paint.

The after picture above is a only 1 coat of the Tung Oil/Paint mixture. I painted it on with a foam brush and wiped it off after a few minutes then reapplied until I got the finish I was looking for. The more coats the darker it gets.

We now have a functional piece that holds hats and keys and doubles as a magnet board. You can also write on tin with a dry erase marker. I love using found objects and turning them into something useful. Maybe that will be my next series...
Tomorrow's Post: Stenciled Chairs

Linking up with:

This has been a busy summer for me also - lots of painting projects! Can't wait to see your transformations :) New follower!
ReplyDeleteI am looking forward to this!
ReplyDelete