Painting Inspiration

National Paint Week: Tutorial Painting British Flag on Fence Boards

I made this British Flag inspired art for my nephew, Kirby. He is 18 and collects flags from around the world, so I thought this would go...

Showing posts with label Redecorate. Show all posts

Tuesday, October 13, 2015

Mix and Chic New Dining Room Inspiration via Chairish

Since we have made the decision to downsize to a smaller home, I have realized that I am going to have to let go of my large dining room furnishings. I have a huge china hutch that is over 10 feet long and a dining table that seats up to 12. This is not going to work in the new house, so I've been window shopping over at Chairish.com. Have you discovered this little gem, yet?

Chairish is online shopping heaven, in my opinion. Their tagline is "Where Design Lovers Buy and Sell" if you are downsizing, like me or love design, this is the place to shop and sell. I love this page on Shabby Chic Style.

I will be going with my same mix of modern and Shabby Chic furnishings for our new home. I will need a much smaller dining room table. I have these 3 in mind:

The color and scale of this Lilly Pulitzer dining set makes my heart happy.


I like the idea of this simple farm table with bench seating. I could squeeze more people around this table and the bench wouldn't take up as much space visually. I'd probably paint the legs white.


This classic design with neutral colors is probably more like what we will go with. If the table had a leaf that extended it, this would be the one.


I will also need a replacement hutch. I found this lovely Vintage Ming Style Lacquered Buffet for only $1450. The scale is much better.

But I really am a Shabby Chic, Vintage loving girl at heart, so I think I will go with something more like this rustic gray piece.


Isn't it dreamy? Oh, and you must check out the accessories, the lighting and the rugs! I want these:


Is my design style "all over the place"? Probably. But I love mixing and matching Shabby Chic, rustic, new and modern pieces to create my own unique "Mix and Chic" style.

Downsizing has been a hard decision, but with most of our children grown, it is time to spend less time on our house and more time on vacation, don't you think? I will be excited to fill the new smaller home with lovely smaller furnishings and will be probably be listing my larger furniture pieces to sell on Chairish.com.

Now on to house hunting! Wish me luck. I'll be blogging our journey.


Tuesday, April 8, 2014

Arranging Modern, Contemporary and Vintage Decor for One Kings Lane

You all know that I am a huge fan of Vintage. Do you revel in vintage flair?


I have several items that belonged to my Grandmother and several (Understatement) that I have collected over the years. I love to create vignettes that play on the juxtaposition of modern contemporary pieces with vintage items. So when One Kings Lane asked me to show how I would arrange vintage and modern contemporary pieces together, I immediately thought of these vintage brass deer and my modern graphic patterned lampshades. 


I love how the warm tones of the brass and yellow work well together. My vintage file cabinet sits in my entry and acts as a console table. The daffodils are "planted" inside of candle holders that have a graphic modern pattern and yet a rustic metal finish. The silver tray is a French Nordic antique that I just love. You don't have to go antiquing to find great items like these.


You can get this look at One Kings Lane:


Graphic Lamps


 I think the best way to pair vintage with modern contemporary pieces is to just have fun with it. Check out this article from One Kings Lane for more ideas on Decorating w/ Vintage.

 Happy Spring!


Monday, December 30, 2013

Painted Pantry Door 2014 Color of the Year Sherwin-Williams Exclusive Plum

My pantry door is pretty uninteresting. It's tucked back in a corner of my dining room behind my really large china hutch. It's so nondescript, that it goes unnoticed by most. So when Sherwin-Williams asked me if I would like to try a sample of the 2014 Color of the Year Exclusive Plum, I knew exactly what I wanted to do with it. I picked up my quart of Sherwin-Williams ProClassic in semi-gloss – it is a high-performance coating (will withstand toughest wear and tear) made for doors and trim. The sheen is perfect. Not too shiny and easily washable.

This was a 30 Minute Paint Project from start to finish. I wiped down the door to eliminate dust and dirt. And painted directly over the existing white paint. No primer necessary. Sherwin-Williams ProClassic paint has great coverage. One coat and a few touch-ups was all it took to cover the door completely.


Here is the door BEFORE

 and AFTER

I love the crisp clean look of fresh paint. This one is a real stand out. (Please ignore the reflection on the door from the water cooler.) I added a new curtain and am seriously considering frosting the freshly cleaned glass to hide the clutter behind it. I need to purchase a new door knob as the old one has seen better days and lots of coats of paint.  It's funny how one project can lead to 3 others, isn't it? 

Here is a little more information about Sherwin-Williams Color of the Year 2014.


This pantry door project only took 1/4 of the quart of paint so you will be seeing Exclusive Plum used several more times here on the blog in 2014.

Happy New Year!


There are so many ways to follow Sherwin-Williams for paint inspiration.
FACEBOOK - Sherwin-Williams
TWITTER - @SherwinWilliams
PINTEREST - @SherwinWilliams
INSTAGRAM - @SherwinWilliams
YOUTUBE - Sherwin-Williams 
GOOGLE+ - Sherwin-Williams 


Disclaimer: I received a quart of Sherwin-Williams ProClassic paint in Exclusive Plum in exchange for writing this post. All opinions expressed are my own. 

Saturday, August 17, 2013

Super Easy Custom Shower Curtain Trick


Isn't this shower curtain cute? The entire bathroom is decorated around it. It's little blue and yellow flowers inspired the yellow walls and hand painted blue mirror.


The shower curtain however has a secret. It's really not a shower curtain. It started out as a set of window draperies. These simple cotton tab top curtains hung on a second shower curtain rod make all the difference in this little space.


The shower curtain is a sturdy vinyl white curtain. The tab topped curtains are just there to add color and softness. (Cuteness, too.)


The tab tops are not necessary. You could use just about any curtain to achieve this look. For example...


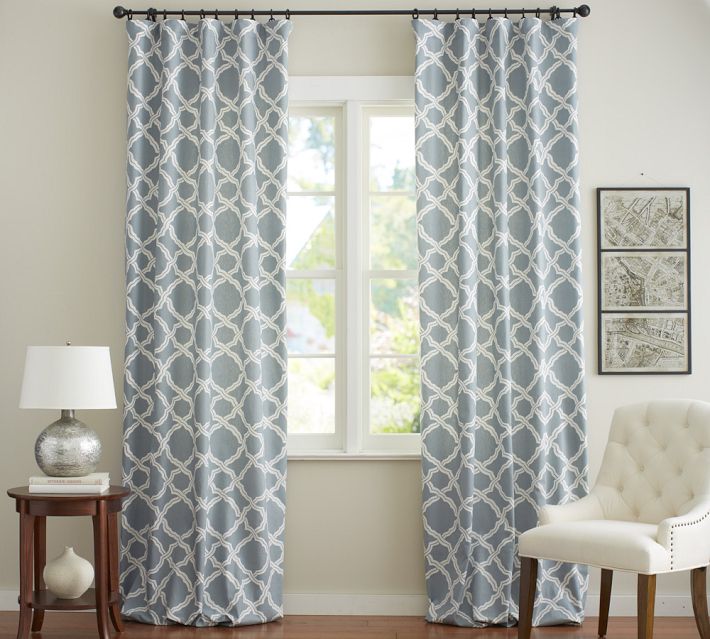
I think these Pottery Barn drapes would make quite an impression as a shower curtain.


I am partial to stripes and have a thing for black and white at the moment. I would love to use these Pottery Barn Teen curtains in my main floor bathroom.

I also like this black and white pair. These babies are only $14.99 for the pair at Ikea. That's a pretty good price for a shower curtain, I think.

Custom does not have to be expensive, just creative.


Monday, July 15, 2013

Altered Tea Towels

Remember a while back when I stenciled a red anchor on to a set of tea towels for my One Room Challenge Room? It was one of the quickest and rewarding craft projects I've done in a long time.


They are still my favorite towels and have washed up nicely over the year, with the paint and stencil still as vibrant today as when I made them.


Today I made tea towels for my kitchen using an image from The Graphics Fairy and an Avery Light Fabric Transfer. Karen at the Graphics Fairy has done all the work on these images by reversing them for you. All you have to do is hit PRINT.  Print it directly on to the transfer paper.


I found both the Fabric Transfers and the cotton tea towels at Walmart so the supplies for this project are very inexpensive.

Here's how I transferred the image on to the tea towel:

Select image and print directly on to the Transfer Paper and trim if desired. I didn't trim mine because I like the rectangle it creates. Circular or small images should be trimmed so that you have less of the transfer paper left on the towel. Pre-wash your tea towels, then iron them. Turn iron to Cotton Setting with NO Steam. (Be sure to read the directions that come with your transfer paper.)


You have to press really firmly and consistently for about 3 minutes to make the transfer happen. Making sure to get the edges really well, as they tend to peal up over time.


After pressing, I hung it over the back of a chair to cool for about 5 minutes while I ironed the second one. 


Once cooled, you can carefully peal off the backing to reveal your design.

 This was an under 30 minute project. I have a few more ideas for altering tea towels that
 I will be sharing next week.

I took a little time off last week to celebrate my Grandson, Cylas' First Birthday.


My daughters and I had lots of fun making the decorations and baking cupcakes and his little Monster cake for the party, in which we hosted 55 people.  I'll be sharing our Little Monster themed decorations and cupcakes soon.


I will be gone the rest of the week because my our little guy here is getting surgery to correct his strabismus in both of his eyes on Wednesday. To be honest, I am more than a little worried about him. If you are a believer in prayer, could you say one for Cylas? I'll keep everyone up to date on Cy via Instagram, Facebook and Twitter.

Thanks my friends! Have a GREAT week!

Monday, March 25, 2013

Etched Glass Peace Signs Tutorial


For my daughter's Hippy Chic apartment, she decided to decorate with peace signs and neon whenever possible. So when it came down to kitchen necessities, we had to customize.


I purchased inexpensive salt and pepper shakers and a glass butter dish at Walmart. Then went to Michael's craft store and purchased Armor Etch (just a 3 oz bottle) and reusable adhesive stencils by Plaid.


I started with a salt shaker and a peace sign stencil. Added a drop of Armor Etch using a craft stick.


I set a timer for 60 seconds then rinsed it off by holding it under the tap and rubbing it gently with a gloved finger. I dried it thoroughly and removed the stencil. This 3 oz bottle is going to go a long way, because I only used a few drops on these little stencils.


I wish I could have gotten this to show up better on camera. But there is a cute little peace sign permanently etched in the glass. You can see them better on the butter dish below.


I stuck the stencil to the butter dish, then Armor Etch, waited and rinsed 3 times.


Now she has a matching set of etched glass salt and pepper shakers and butter dish. This was an incredibly easy project that took a total of 15 minutes to complete. The stencils are available in a variety of designs and the possibilities are endless. I am doing wine glasses for myself next.


Sunday, October 21, 2012

31 Days of Paint #22 Painting Numbers

31 Days of Paint

Thank you for coming back to my 31 Days of Paint Series. If you would like to see it from the entire series just click HERE.

I love numbers. Like this huge 15 below. It just makes me happy. I am sure it has some significance to the owner, don't you think?


These numbered stairs are so sweet. My kids all went through a stair counting phase. 


This numbered dresser with it's odd mismatched drawer pulls is just my style. I can imagine it filled with all sorts of craft items.


These are the randomly numbered chairs that I painted for my oldest daughter. She still loves them.

PA124412

See the tutorial on how easy it is to stencil random numbers on the back of chairs HERE.

PA204649

And see where gave my numbered chairs a striped seat HERE.

Today I started working on a dresser that is numbered like this one for Sophie's room. I saw this one  at one of my favorite antique stores called  JUNK in Coeur d'Alene and I thought: I can do that. And so could you!

Happy Painting!